Build your first course on TopperBatch in ten minutes
A screenshot-by-screenshot walkthrough: from an empty console to a course with a structure, a lesson and a class code students can join with.
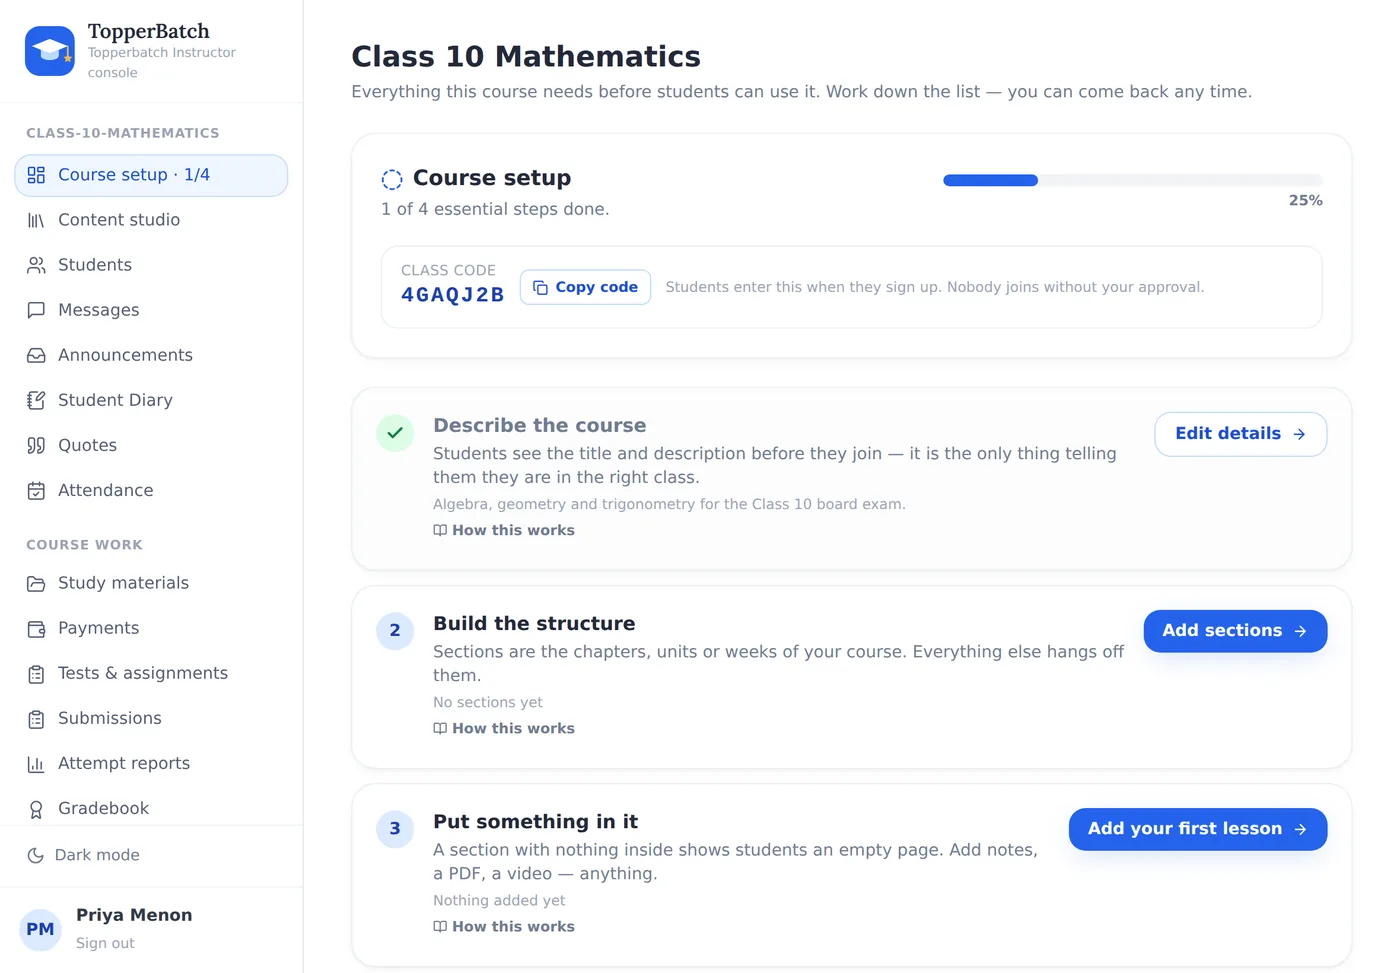
The most common thing we hear from a new instructor is not "this is missing" — it is "I do not know where to start". This walkthrough answers that. Ten minutes, four steps, and a live course at the end.
1. Create the course
Sign in and you land on your teaching console. It shows every course you own, and nothing belonging to anyone else.
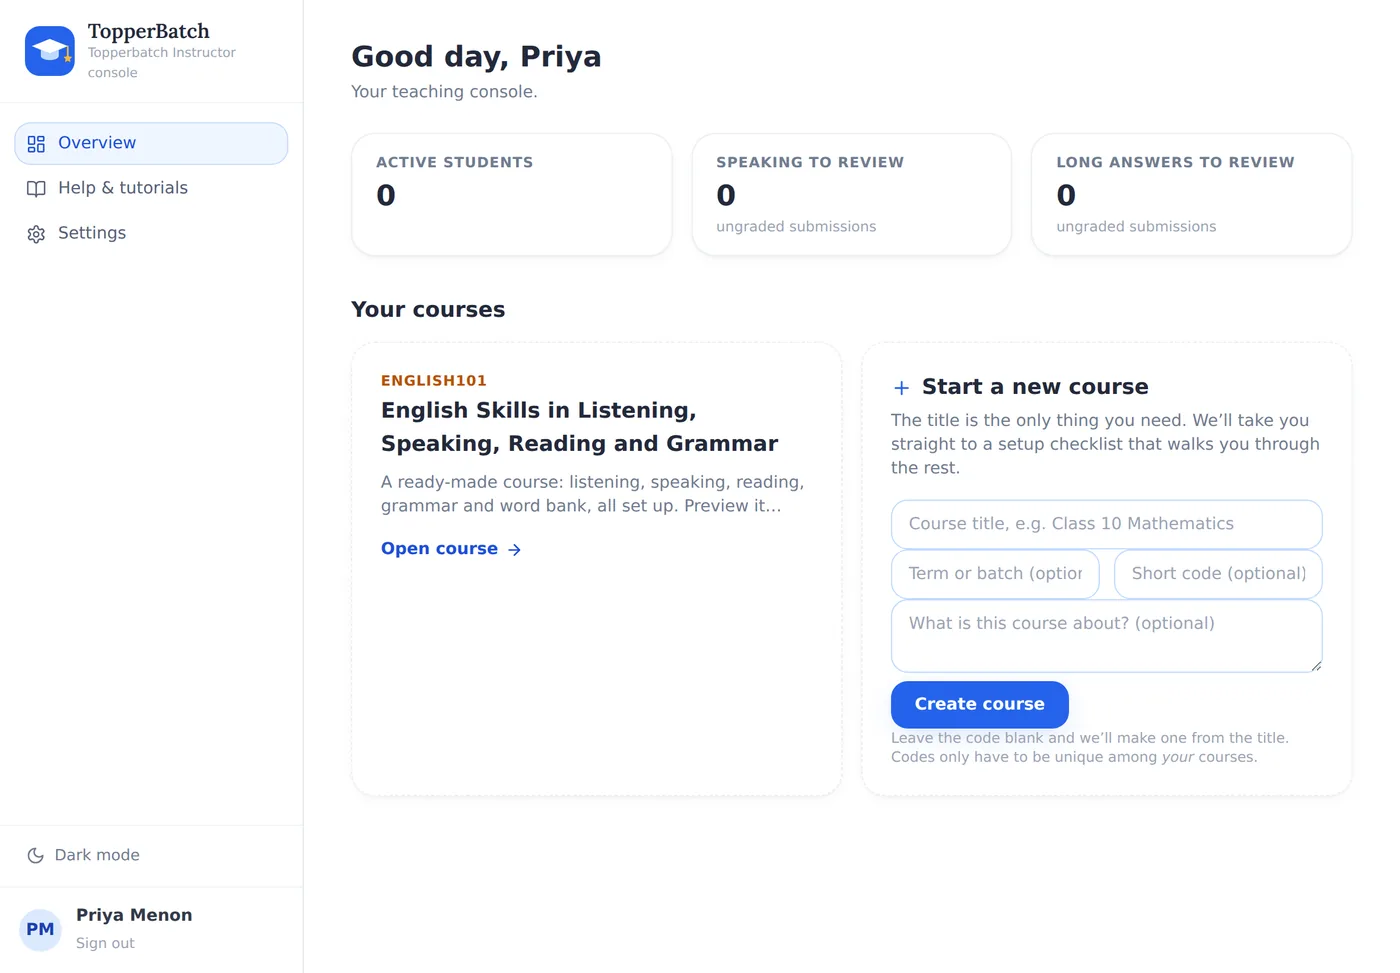
In the "Start a new course" card, type the title. That is genuinely all that is required — "Class 10 Mathematics", "NEET Biology — Batch B", "CSEG3060 Research Methodology".
The short code and term are optional. If you leave the code blank we build one from the title. And codes only need to be unique among your courses: another instructor already using MATH101 does not block you.
If you have used the platform before and hit "A course with code MATH101 already exists", that was a real bug and it is fixed. Codes are per instructor now.
2. Land on the checklist
Creating the course takes you straight to its setup page — which is the answer to "what do I do next?".
Four essential steps, two optional ones, a progress bar, and your class code at the top. Every item links to the exact page that completes it, so you never have to hunt through the sidebar.
3. Give the course a shape
Content studio → Course structure. A new course is deliberately empty. We do not guess whether you teach chemistry or conversational French.
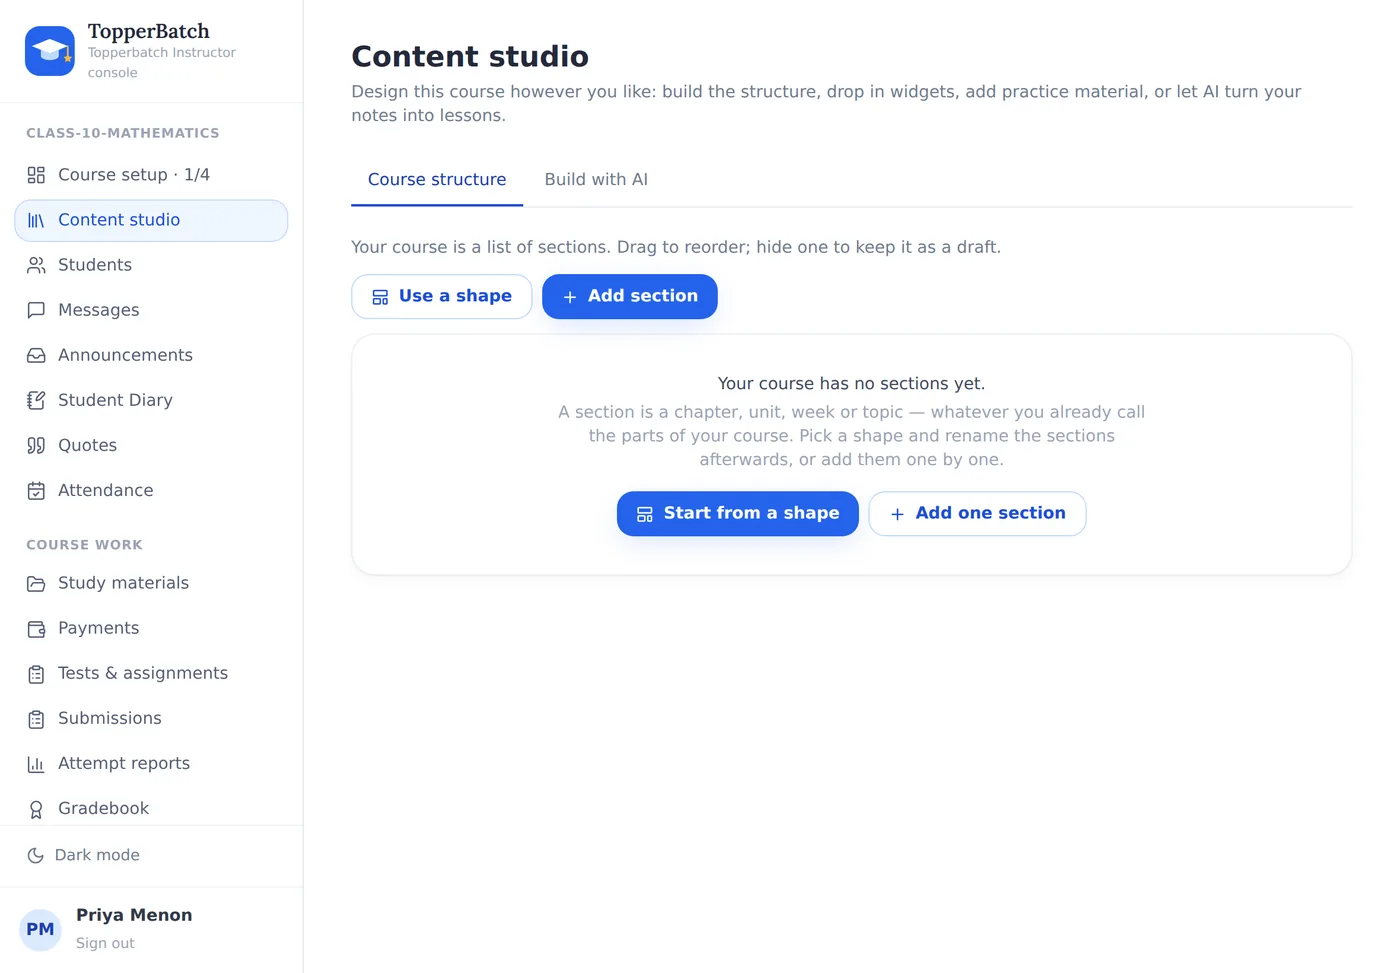
Click Use a shape:
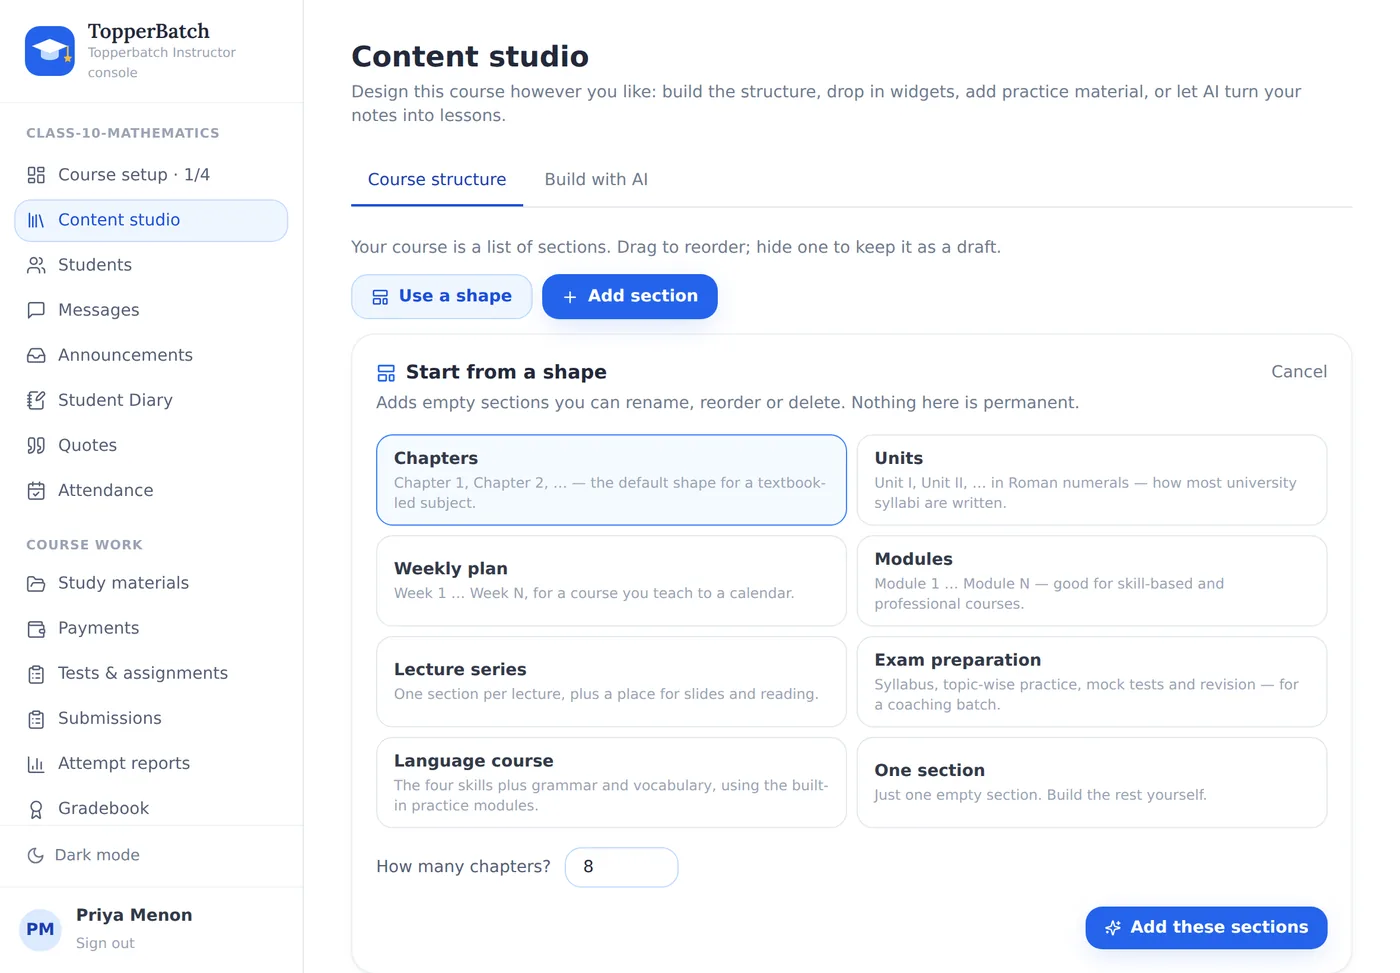
- Chapters — Chapter 1, Chapter 2, …
- Units — Unit I, Unit II, … in Roman numerals, the way most university syllabi are written
- Weekly plan — Week 1 to Week N
- Modules — for skill-based and professional courses
- Lecture series — one section per lecture, plus an introduction and a reading list
- Exam preparation — syllabus, topic-wise practice, mock tests, revision
- Language course — the five built-in practice modules
- One section — if you would rather build it yourself
Choose how many you want and add them. Nothing a shape creates is permanent: rename, reorder, hide or delete any of it.
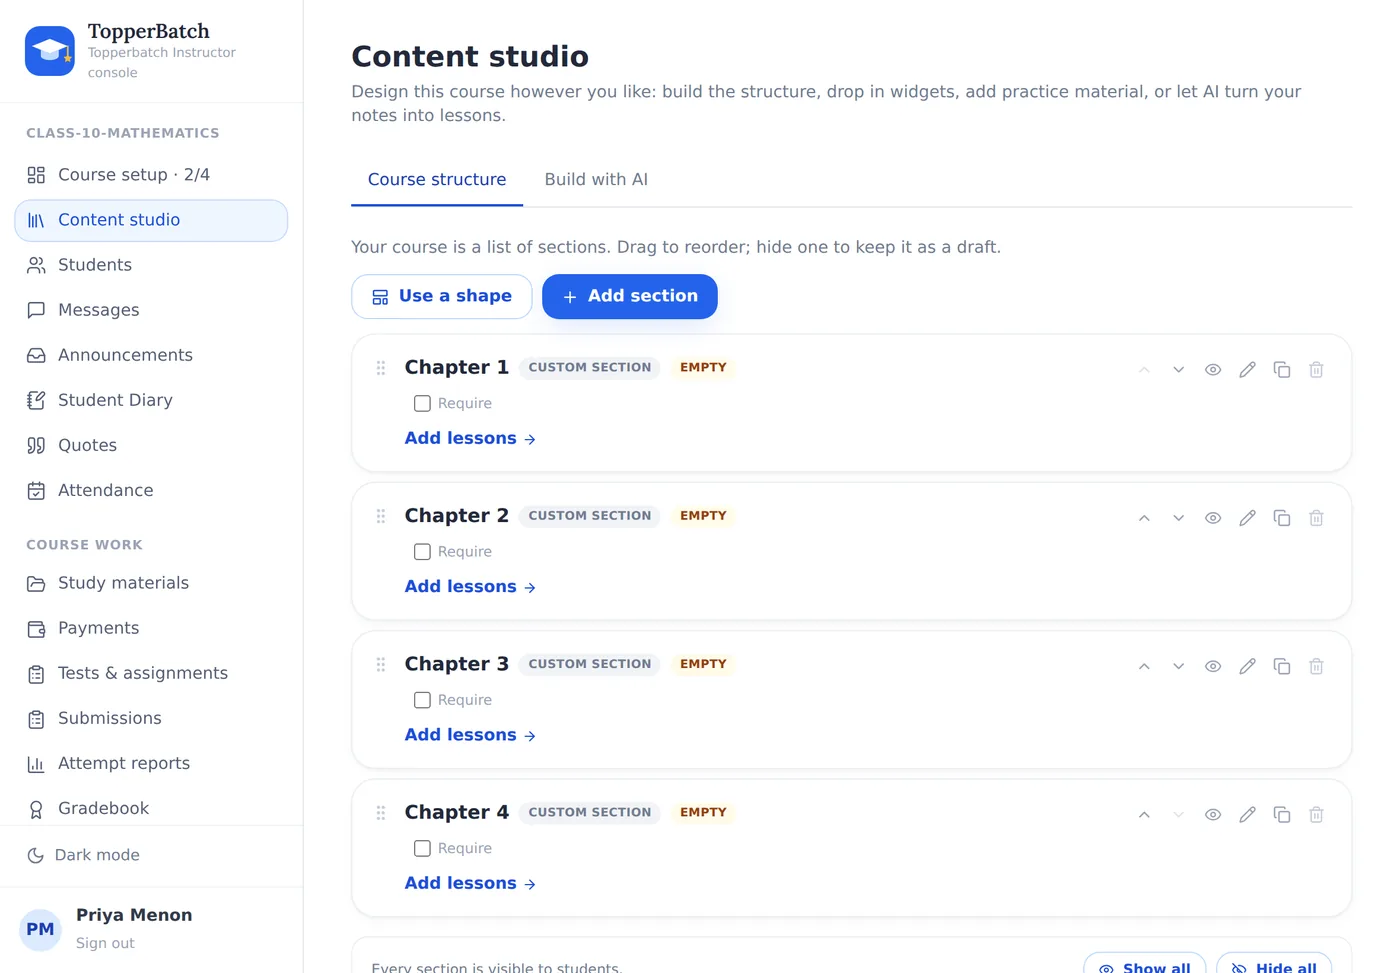
4. Put a lesson in it
Click Add lessons on any section.
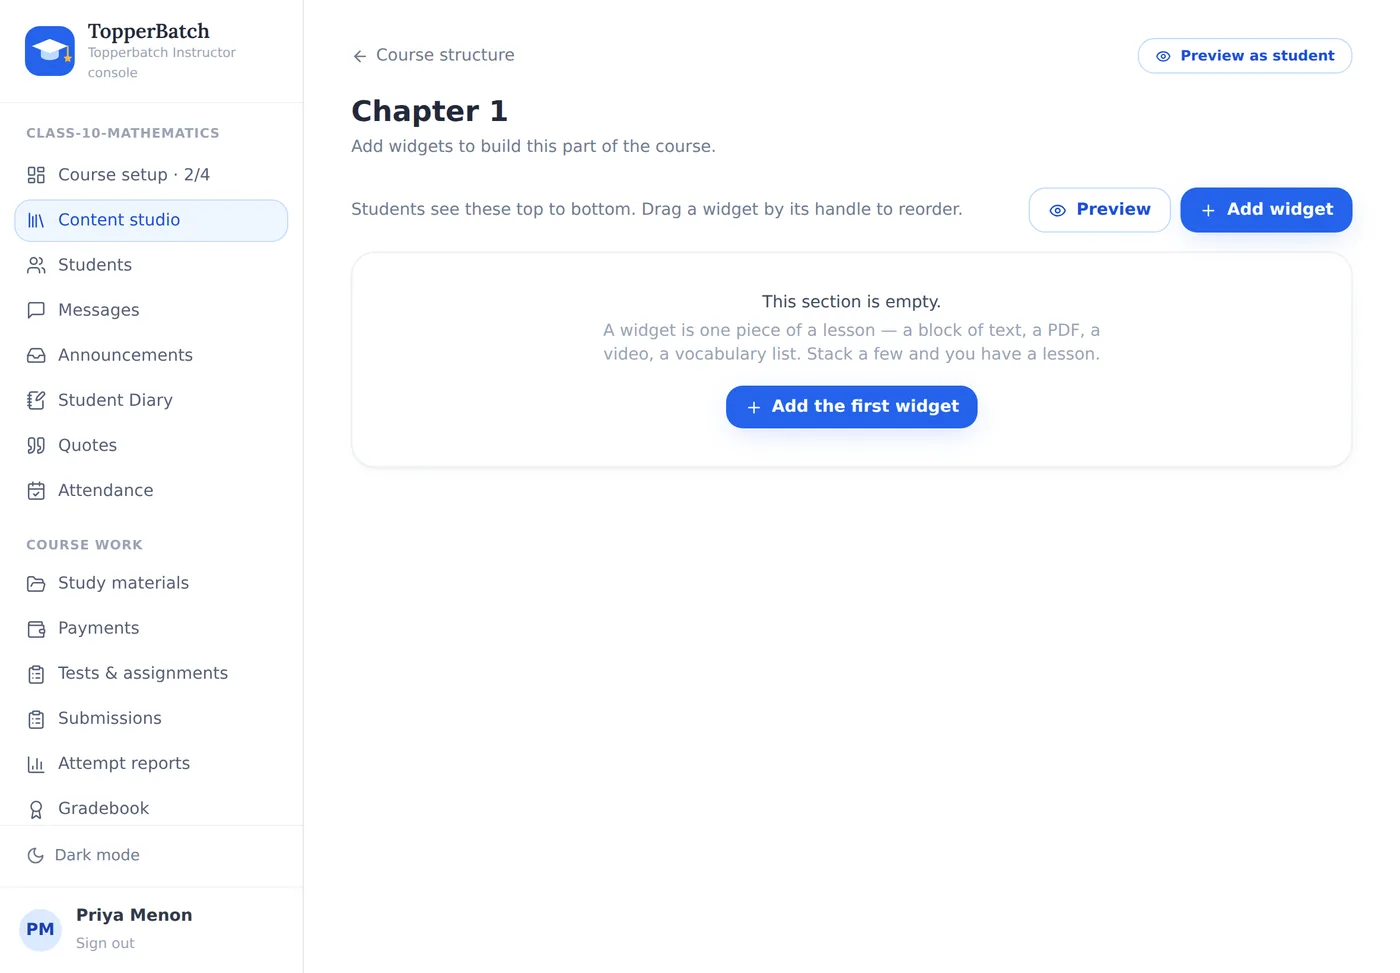
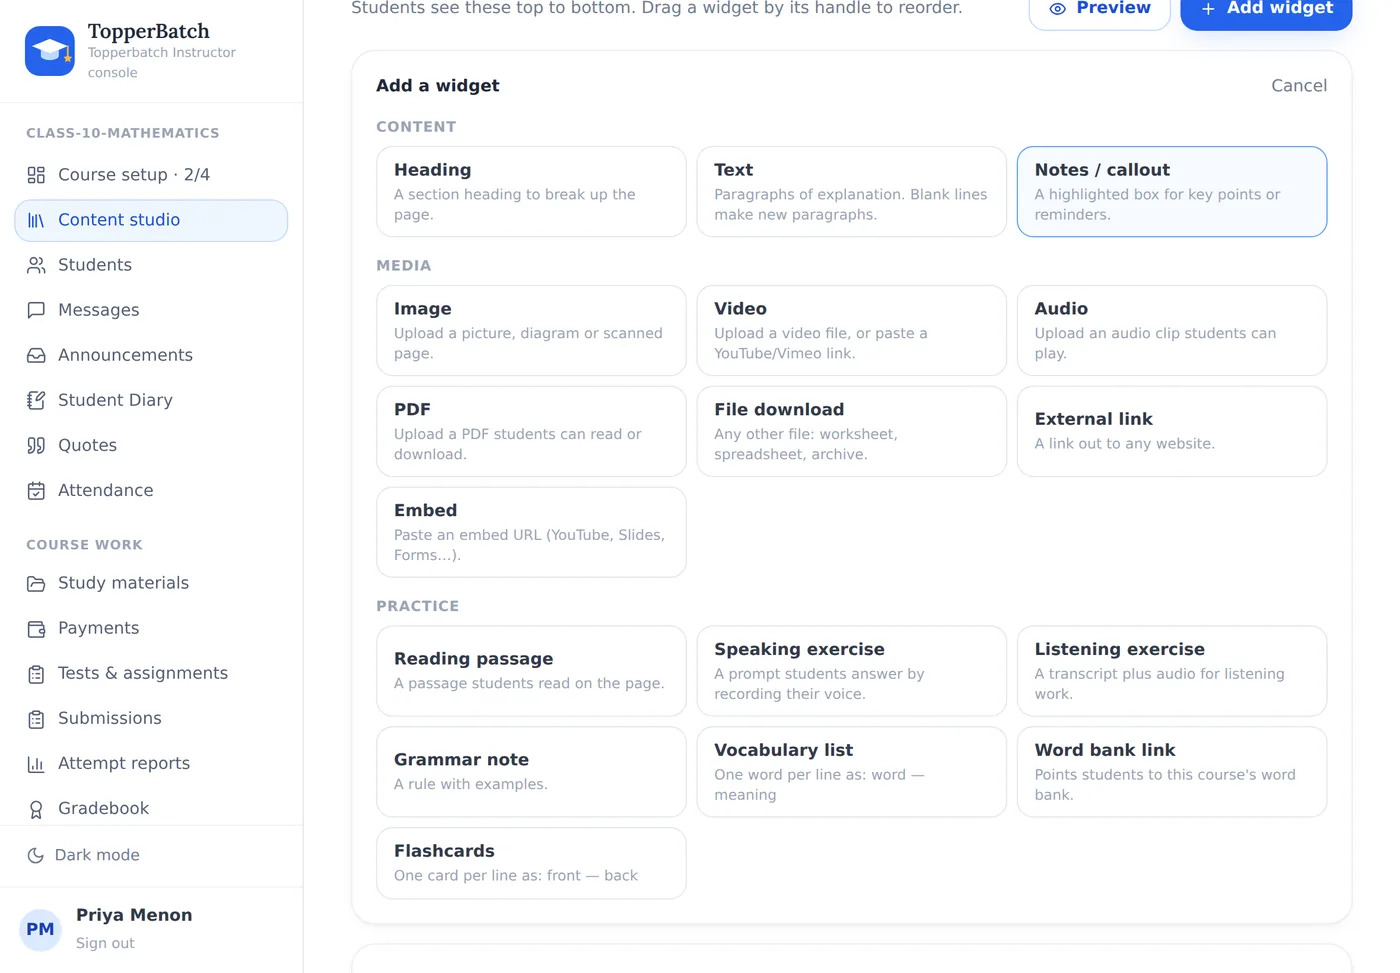
A widget is one piece of a lesson. There are seventeen kinds, grouped so you can scan them.
Each widget shows only the fields it actually uses, with a placeholder telling you the exact format expected.
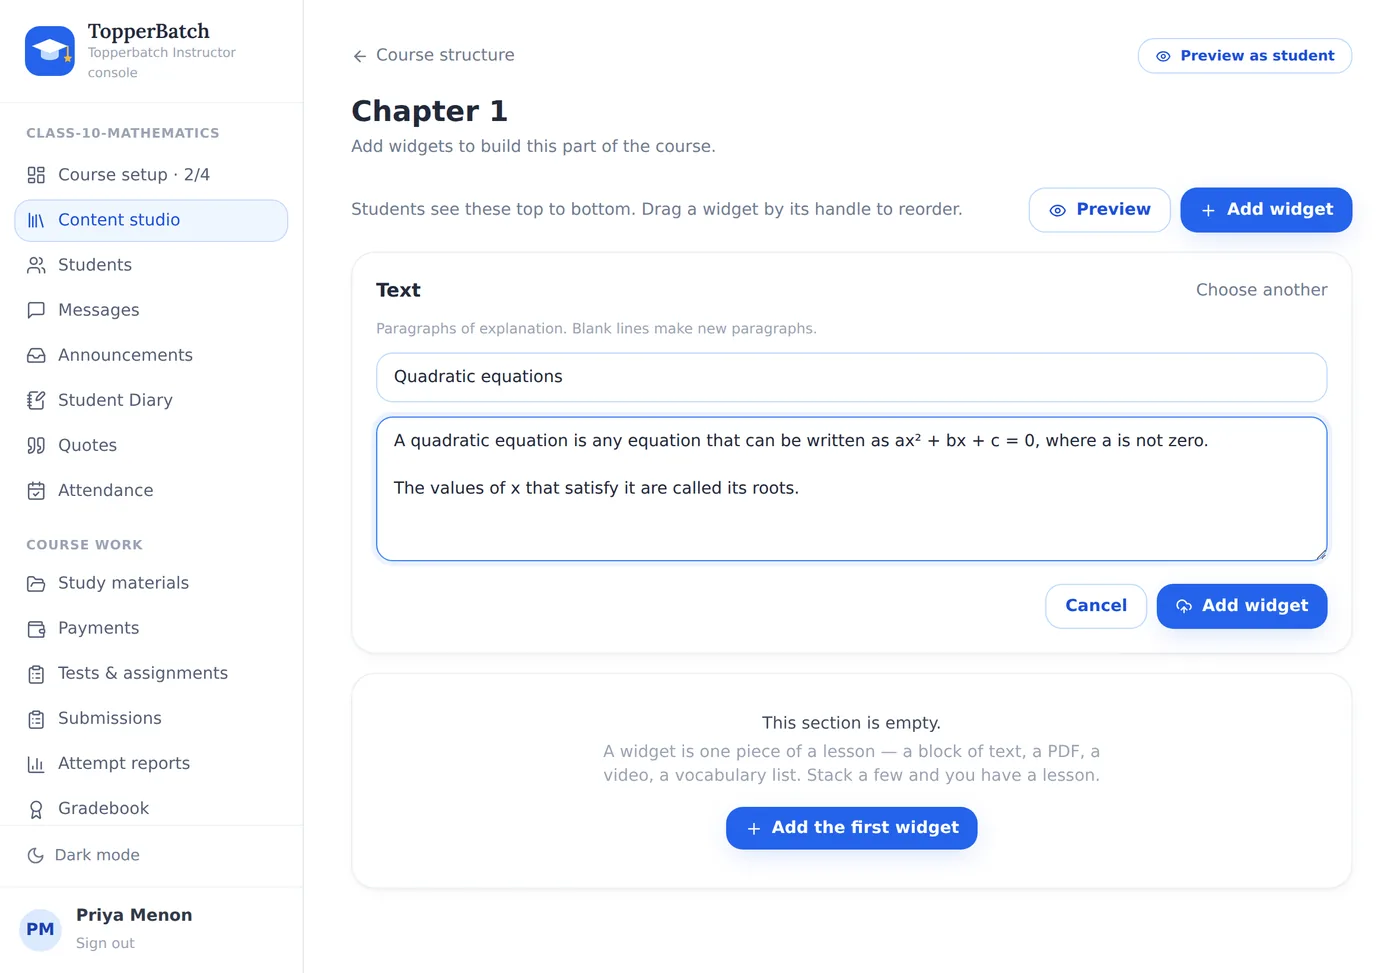
Stack a few and you have a lesson. Drag them by the handle to reorder; the corner arrow inserts a new widget directly below an existing one, so you can slot something into the middle of a finished page.
5. Check it, then invite the class
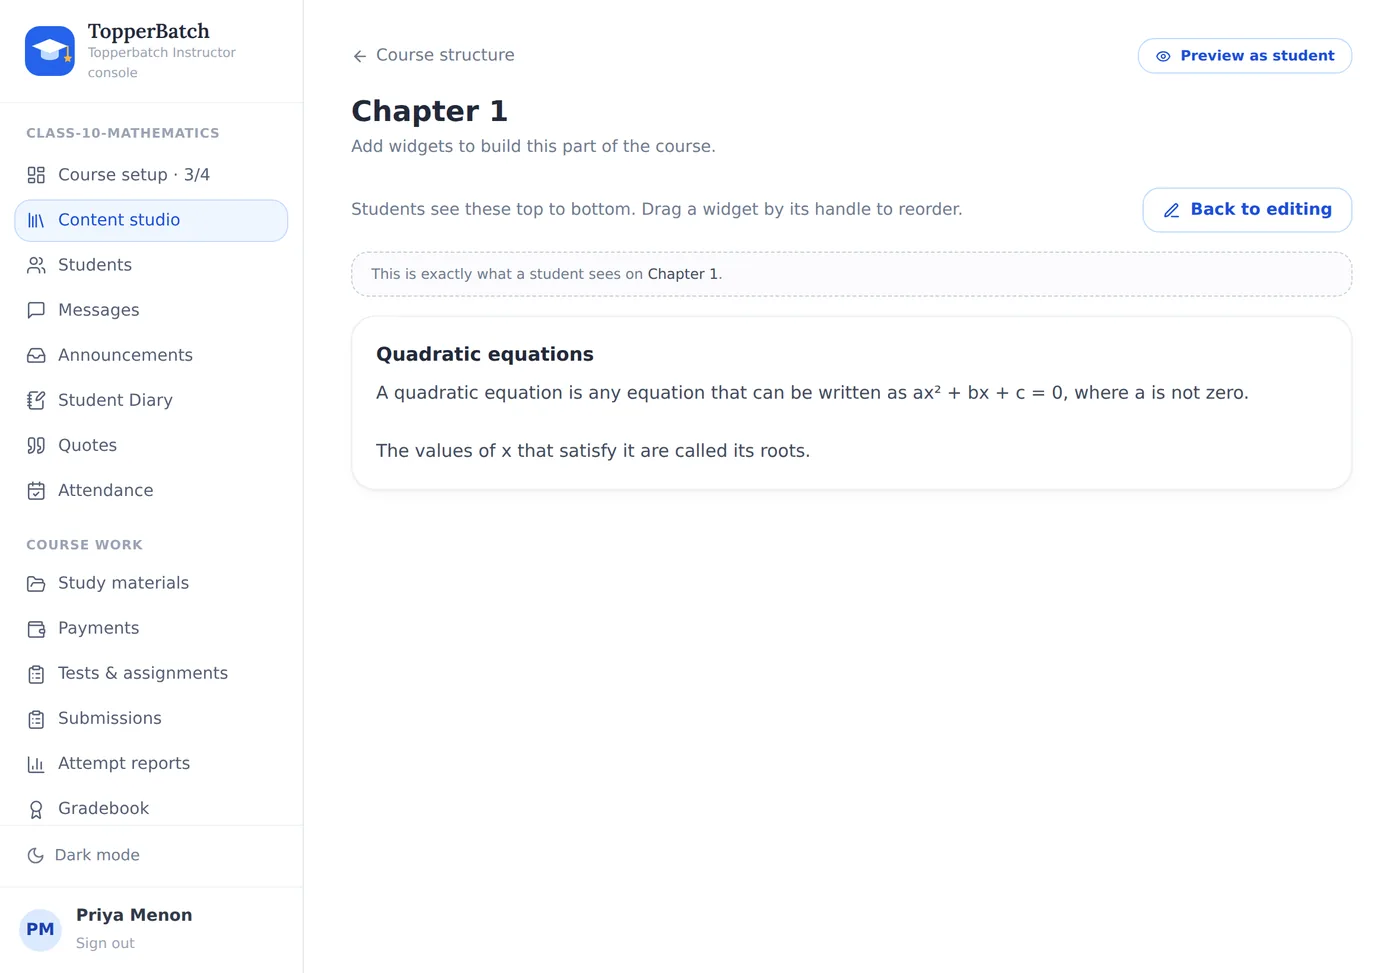
Preview renders the section exactly as a student sees it — not an approximation.
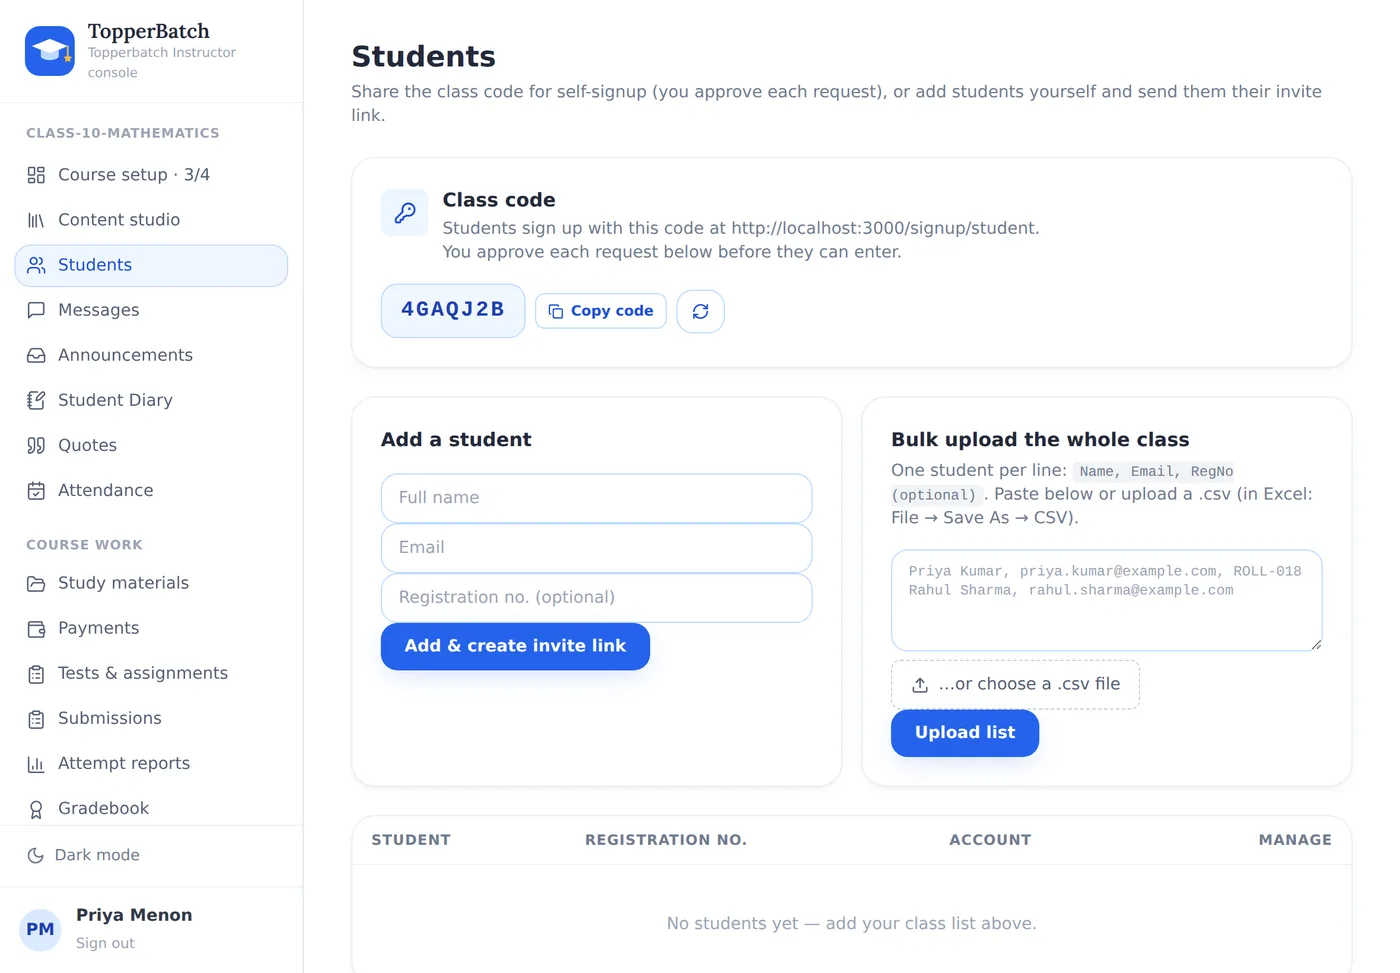
Then share your class code. Students sign up, type the code, and appear in your Students page as a pending request. Nobody joins without your approval.
That is a live course. Everything after this — tests, attendance, the gradebook, certificates — is additive.
Run your class the way you want to
Materials, assignments, attendance, grades and fees in one place, under your own brand.
Create your classroomKeep reading
How to run a coaching class without drowning in paperwork
Attendance registers, fee diaries, WhatsApp groups and photocopied worksheets. Here is how small institutes replace all of it with one system, without losing the personal touch.
Why your class needs its own space, not another WhatsApp group
Group chats are wonderful for conversation and terrible for coursework. A look at what breaks as your batch grows, and what to do instead.